Sourdough starter is the cornerstone of artisanal baking, celebrated for its ability to create flavorful and naturally leavened bread. Unlike commercial yeast, a sourdough starter is alive, nurtured through a simple blend of flour and water that ferments over time. This magical process harnesses wild yeast and bacteria to develop the tangy taste and airy texture that define sourdough bread.
In recent years, sourdough baking has gained immense popularity among home bakers, offering not only delicious results but also a deeper connection to the baking process. Making a sourdough starter may seem intimidating at first, but it’s surprisingly straightforward and requires only a few ingredients and tools. Once you’ve mastered the basics, a whole world of baking possibilities opens up—from rustic loaves to creative recipes using sourdough discard.
This guide will walk you through each step of creating and maintaining a sourdough starter, providing tips for troubleshooting and maximizing success. We will also delve into creative applications for your starter, guaranteeing that nothing is wasted. Whether you’re a seasoned baker or a curious beginner, this resource will equip you with the knowledge to confidently start your sourdough journey.
With patience and practice, you’ll discover the joy of baking bread that’s healthier, tastier, and uniquely yours. Let’s dive into the art of sourdough starter creation and unlock the secret to making bread that’s as fulfilling to bake as it is to eat.
What Is a Sourdough Starter?
A sourdough starter is a natural leavening agent made by fermenting a mixture of flour and water. This simple combination creates a living culture of wild yeast and lactic acid bacteria, which thrive by consuming the natural sugars in flour. The byproducts of this process—carbon dioxide and organic acids—are what make sourdough bread rise and give it its distinct tangy flavor.
The Science Behind a Sourdough Starter:
At its core, a sourdough starter is a microbiological ecosystem. The wild yeast is responsible for leavening, creating the air pockets that give sourdough its airy texture. Meanwhile, the bacteria produce lactic and acetic acids, which not only contribute to the sour flavor but also act as natural preservatives. This unique fermentation process is what sets sourdough apart from bread made with commercial yeast.
Why Use a Sourdough Starter?
A sourdough starter offers several advantages over commercial yeast:
- Flavor Development: The prolonged fermentation enhances flavor complexity, delivering a tangy, rich taste.
- Health Benefits: Sourdough bread is easier to digest and contains probiotics that support gut health.
- Natural Process: It’s free from additives, relying solely on wild yeast and bacteria.
Cultural and historical significance:
Sourdough starters have been used for thousands of years, long before commercial yeast was available. They’ve played a vital role in traditional baking, passed down through generations as prized family heirlooms. Even today, bakers take pride in maintaining their unique starters, which reflect the environment they’re cultivated in.
Understanding what a sourdough starter is will help you appreciate the art and science behind this age-old bread-making technique. With proper care, your starter can last indefinitely, becoming an integral part of your baking journey.
Benefits of Using a Sourdough Starter:
- Natural Leavening: No commercial yeast is needed.
- Enhanced Flavor: Adds a tangy, complex profile to bread and other baked goods.
- Healthier Option: Contains probiotics that may aid digestion.
For more advanced baking ideas, check out this guide to making a Sourdough Bagel Recipe, which pairs perfectly with cream cheese or smoked salmon.
Ingredients and Tools Needed
Ingredients:
- Flour: All-purpose, whole wheat, or rye flour work best.
- Water: Use filtered or distilled water to avoid chlorine interference.
Tools:
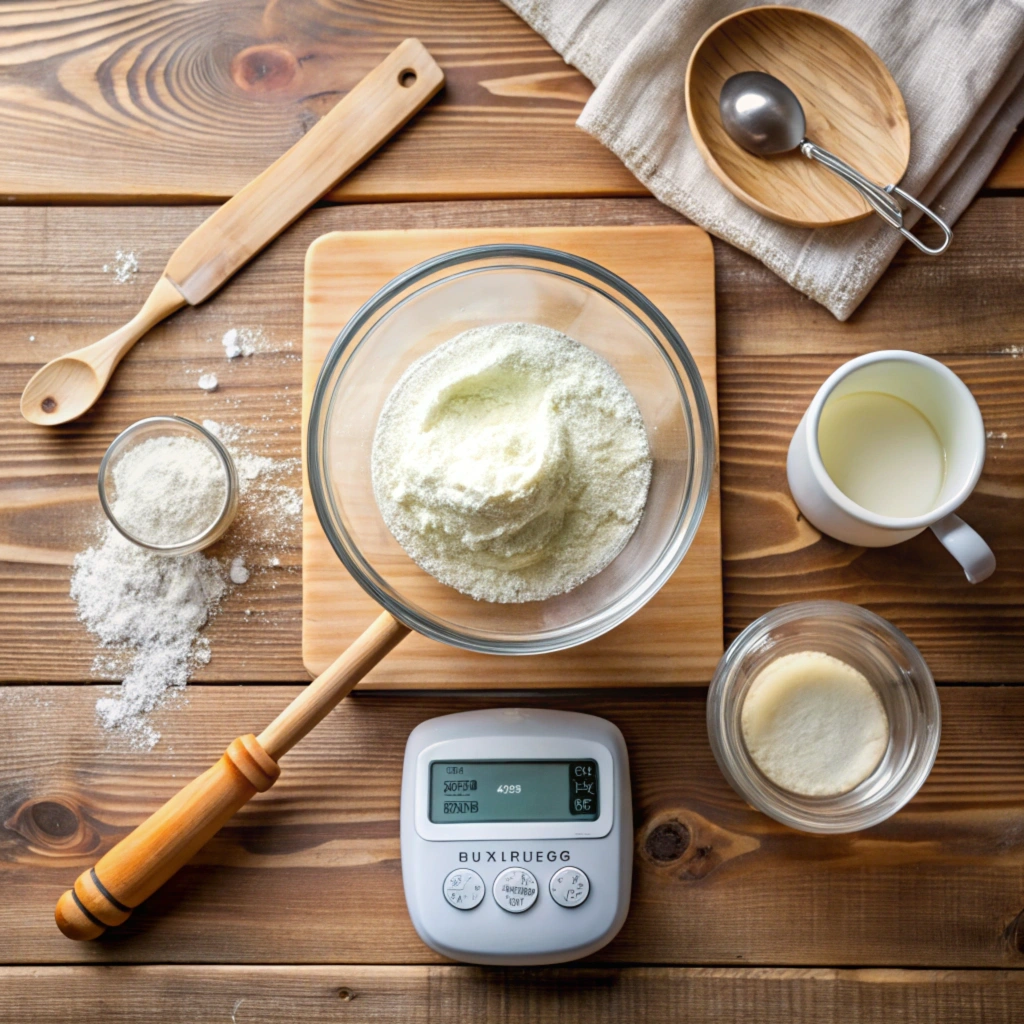
- A clean glass jar or container with a loose-fitting lid.
- A digital kitchen scale for accurate measurements.
- A wooden or silicone spoon for mixing.
- A thermometer to monitor the ambient temperature.
For meal-prep enthusiasts, pair your sourdough creations with breakfast burritos for a balanced and satisfying start to the day.
How to Make a Sourdough Starter
Day 1: Getting Started
- Mix 50 grams of flour with 50 grams of water in a clean jar.
- Stir until there are no lumps, ensuring the consistency is smooth.
- Cover loosely and leave in a warm area (70°F is ideal).
Days 2–7: Building the Starter
- Day 2: Look for bubbles, a sign of microbial activity. Discard half the mixture and feed with 50 grams of flour and 50 grams of water.
- Days 3–5: Activity should increase with more bubbles and a noticeable rise. Continue daily feedings.
- Days 6–7: Once the starter doubles in size within 4–6 hours of feeding, it’s ready for use.
Tips for Success
- If the starter lacks activity, try using whole wheat or rye flour.
- Avoid extreme temperatures, as they can hinder fermentation.
- For sweet recipes, consider incorporating sourdough discard into these Mini Pancakes, which are fluffy and delicious.
How to Maintain a Sourdough Starter
Feeding and Storage:
- Room Temperature: Feed daily with equal parts flour and water.
- Refrigeration: Feed weekly and bring to room temperature before use.
Reviving a Dormant Starter:
- Remove the starter from the fridge and allow it to warm to room temperature.
- Discard half and feed as usual. Repeat this process for 1–2 days to reactivate.
If you’re short on time, sourdough discard can be used in creative recipes like Blueberry Overnight Oats, offering a healthy and convenient breakfast option.
How to Use a Sourdough Starter
Incorporating Starter into Recipes
Use a Digital Scale to Measure the Required Amount of Starter (Typically 100–150 Grams):
When incorporating sourdough starter into recipes, precision is key. Using a digital scale to measure the starter ensures accuracy, especially when the recipe calls for a specific amount. Most sourdough recipes typically require between 100 and 150 grams of starter, but it’s always best to check the recipe for the exact amount needed. A scale eliminates any guesswork and ensures that you’re using the correct ratio of ingredients for the right consistency and rise in your dough or batter. Consistent measurement will help you achieve the desired texture, flavor, and fermentation of your baked goods, ensuring a successful outcome each time.
Adapt Recipes by Accounting for the Starter’s Hydration Level:
Sourdough starters come in different hydration levels, typically ranging from 100% (equal parts water and flour) to thicker or more liquid starters. The hydration level of your starter affects the dough’s final texture, so it’s essential to adapt recipes accordingly. If your starter is more liquid (high hydration), you may need to reduce the amount of water or liquid in your recipe to maintain the proper dough consistency. Conversely, if your starter is thicker, you may need to add a little more liquid to achieve the desired dough feel. Understanding your starter’s hydration and adjusting other ingredients accordingly ensures that your dough will rise as expected and that the final product will have the right texture.
Creative Uses for Sourdough Discard:
Pancakes and Waffles: Add Discard for Extra Flavor
Use the leftover sourdough by adding it to pancakes or waffles instead of discarding it. The tangy flavor of the sourdough adds depth and complexity to your breakfast favorites. Sourdough discard is a fantastic way to add a slight sourness to pancakes and waffles, balancing the sweetness of syrup and toppings. Plus, the discard provides a light texture and a bit of extra moisture to the batter. Simply replace a portion of the flour in your recipe with sourdough discard, adjusting the other liquid ingredients as needed. This is a great way to use up your discard while still creating delicious, fluffy breakfast treats.
Crackers and Flatbreads: A Great Way to Experiment with Textures
Sourdough discard is ideal for making homemade crackers or flatbreads, where the added tang can enhance the flavor and provide a delightful texture. The discard can be mixed with flour, olive oil, herbs, and spices to create a crisp, flavorful cracker dough or a soft, chewy flatbread. Because you’re working with already-fermented discard, the dough will have a unique depth of flavor and a pleasant tang that adds complexity to these baked snacks. Crackers made with sourdough discard can be extra crispy and perfect for pairing with cheeses, dips, or spreads. It’s an excellent opportunity to experiment with different flavor combinations and textures while reducing waste.
Desserts: Use Discard in Your Favorite Cookie or Brownie Recipes
Sourdough discard isn’t just for savory dishes—it can also be used in dessert recipes to add a unique twist. Incorporating discard into cookie or brownie recipes is a fantastic way to reduce waste and infuse an extra layer of flavor into your treats. The natural acidity of the sourdough balances out the sweetness of the dessert, giving the cookies or brownies a richer, more complex flavor profile. Try substituting a portion of the flour with sourdough discard, or you can even experiment by replacing a small amount of sugar with discard to add some tang. Whether you’re baking chocolate chip cookies, brownies, or other treats, the discard contributes an unexpected depth of flavor that will surprise and delight your taste buds.
For a special treat, top your pancakes with 3-Ingredient Chocolate Gravy for a rich and indulgent breakfast or dessert.
Tips for Perfect Sourdough Starter
Consistency Is Key: Feed the Starter at the Same Time Daily for Predictable Results
One of the most crucial factors in maintaining a healthy sourdough starter is feeding it at the same time every day. By keeping a consistent schedule, you help your starter establish a reliable fermentation pattern. This regularity ensures that the wild yeast and bacteria in your starter have enough time to grow, consume the flour, and release gases. The more predictable the feeding routine, the more consistent your starter’s activity will be, leading to better results when it’s time to bake. A good habit is to mark a time on your calendar or set a reminder so that feeding becomes a part of your daily routine. This consistency fosters a more resilient starter and allows you to have more control over your sourdough bread-making process.
Monitor Temperature: Warm Environments Promote Faster Fermentation, While Cooler Temperatures Slow the Process
Temperature plays a vital role in the fermentation of your sourdough starter. Wild yeast and bacteria are most active in warmer environments, typically between 70°F and 75°F (21°C and 24°C). If your kitchen is warm, your starter will ferment more quickly and may need to be fed more frequently. Conversely, cooler temperatures slow down the fermentation process, meaning that the starter will take longer to rise and may need less frequent feedings. It’s important to monitor the temperature of the environment where your starter is kept, as it can directly affect the timing of your feedings and the overall strength of the starter. Consider placing your starter in a slightly warmer area, such as near a heating vent or atop your refrigerator, to encourage activity if you’re seeking faster results. If you’re looking for slower fermentation, a cooler spot in your kitchen or even the fridge can help.
Experiment with Flours: Rye or Whole Wheat Flours Encourage Robust Activity
The type of flour you use can have a significant impact on the performance of your sourdough starter. Rye and whole wheat flours are particularly beneficial for fostering strong starter activity. These flours contain more nutrients, including bran and germ, which wild yeast and bacteria thrive on. Rye flour, in particular, is known for producing a more vigorous fermentation because it’s rich in enzymes that promote the breakdown of starches into simpler sugars, which the yeast can readily consume. While all-purpose flour works well for a starter, experimenting with rye or whole wheat flour may result in a more active and robust starter. Some bakers even recommend switching to rye or whole wheat for a few days to boost starter strength before returning to all-purpose flour for baking. The additional nutrients in these flours can help jump-start a sluggish starter, especially in the early stages of cultivation.
For inspiration, learn about unique applications like this sourdough bagel recipe, perfect for breakfast or brunch gatherings.

FAQs
What is a sourdough starter, and how does it work?
It’s a naturally fermented mixture of flour and water. The wild yeast and bacteria create leavening for bread and impart a unique flavor.
How long does it take to make a sourdough starter?
Typically, 5–7 days.
Can I use whole wheat flour for a starter?
Yes, whole wheat flour is excellent for starting and maintaining a sourdough starter.
Why is my starter not rising?
Low temperatures, insufficient feeding, or using chlorinated water may be the issue.
Can you freeze a sourdough starter?
Yes, freeze small portions in airtight containers for long-term storage.
Conclusion
Creating and maintaining a sourdough starter is more than just a baking task—it’s an experience that connects you to centuries of bread-making traditions. With a simple mixture of flour and water, you can cultivate a living culture that brings depth, flavor, and health benefits to your bread. While the process may require patience, the rewards are undeniable. Each loaf of sourdough is a testament to your care and the unique environment in which your starter thrives.
Beyond bread, a sourdough starter unlocks an array of culinary opportunities. From pancakes to crackers, even the discard can be turned into delicious treats that reduce waste and add variety to your baking repertoire. The versatility of sourdough ensures that every baker, regardless of skill level, can find creative ways to use it in the kitchen.
Remember, success with sourdough is all about consistency. Regular feeding, monitoring temperature, and experimenting with different flours will help you achieve the best results. And when things don’t go as planned, troubleshooting your starter can be part of the learning process.
As you embark on this sourdough journey, take pride in every step, from nurturing your starter to baking your first loaf. The process is as fulfilling as the results, offering both a creative outlet and a delicious reward. So grab your jar, mix some flour and water, and start creating bread that’s not only better for you but also a true reflection of your unique baking style.









You might also like these recipes
Do You Wash Chicken Keema? The Ultimate Guide to Safe Handling
The Best Side Dishes to Serve With Chili Dogs
Is It Better to Pan Fry or Oven Bake Chicken?